

Magento extension First Data Gateway Integration by Rave Infosys
MageCloud partnered with Rave Infosys to offer First Data Gateway Integration in your MageCloud panel for our simple 1-click installation option. To install this extension - create your account with MageCloud and launch a new Magento store. It takes only 3 minutes.
Rave Infosys always provides support for customers who have installed First Data Gateway Integration Magento module. Feel free to leave a review for the company and the extension so we can offer you better products and services in the future.
You may want to check other Rave Infosys Magento extensions available at MageCloud and even get extensions from hundreds of other Magento developers using our marketplace.
This extension allows you to make payments using First Data Global Gateway for all your online shopping needs.
Compatible with Magento 1.x
First Data Gateway Integration
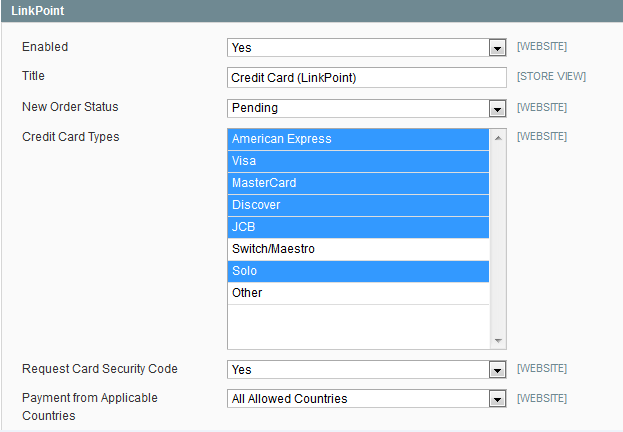
To facilitate the payment options, this extension provides seamless integration with First Data Global Gateway. This extension allows you to make secure payments using FirstData Global Gateway for all your online shopping needs. It supports all credit cards such as Visa, MasterCard, AE, JCB etc.
The customer is not required to leave the Magento store for making the payment. FDGG does support multiple currencies however you need to check FDGG website for latest updates.
FDGP API version 3.0 is used to enable payments using FirstData merchant services within your portal.
Features
- Easy Installation
- Secure and faster payments.
- Compatibility with Magento community editions.
Compatible with following versions
1.5, 1.6, 1.6.1, 1.6.2.0, 1.7.x, 1.8.x
Configuration Steps
Once you install this extension, next step is to configure it so that it will be available at your cart.
- STEP1 : Login to admin panel of your Magento.
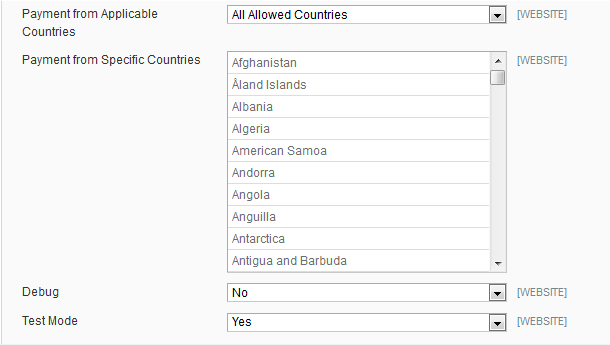
- STEP2: Go to: System-> Configuration -> Sales -> Payment Methods
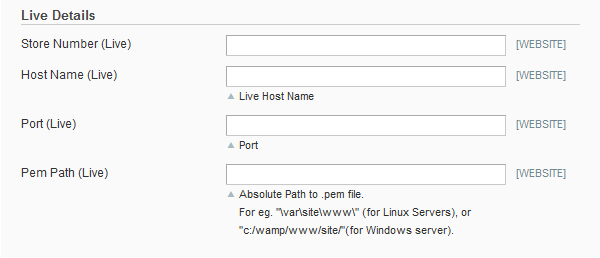
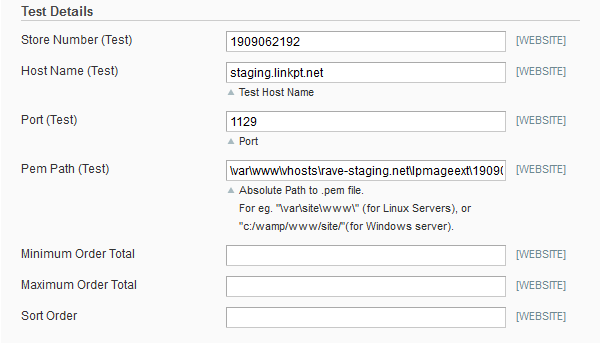
- STEP3: Now under "Live Details" or "Test Details" (if you want to run under Test Mode), add the following:
- STEP 3.1: Add Store Number
- STEP 3.2: Add Host Name
- STEP 3.3: Add PORT
- STEP 3.4: Add PEM File Path:
Please Note: All the information which is listed in the STEP 3 is provided by the LinkPoint, if you are registered with this. If you don't have these information, you need to first get registered with the LinkPoint