


Magento extension Knox Payments by KnoxPayments
MageCloud partnered with KnoxPayments to offer Knox Payments in your MageCloud panel for our simple 1-click installation option. To install this extension - create your account with MageCloud and launch a new Magento store. It takes only 3 minutes.
KnoxPayments always provides support for customers who have installed Knox Payments Magento module. Feel free to leave a review for the company and the extension so we can offer you better products and services in the future.
You may want to check other KnoxPayments Magento extensions available at MageCloud and even get extensions from hundreds of other Magento developers using our marketplace.
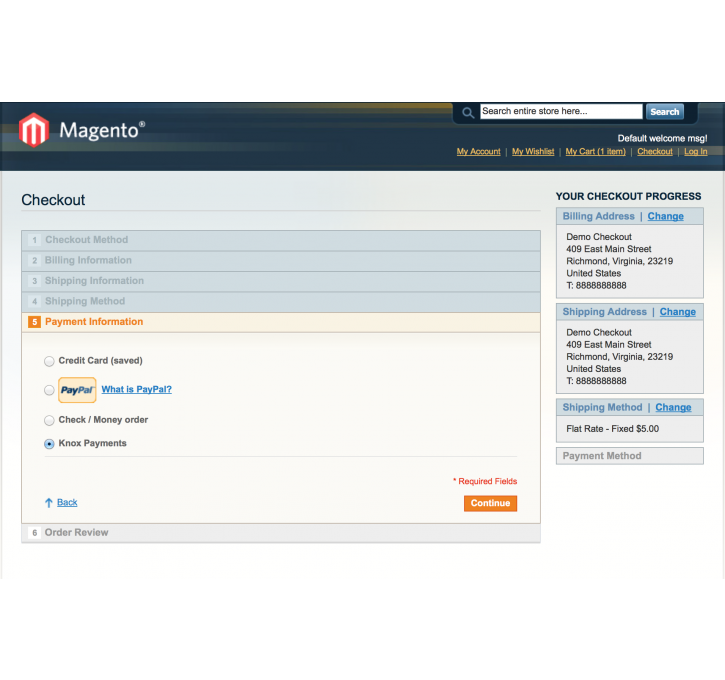
Allow customers to pay seemlessly with their online banking credentials.
Compatible with Magento 1.x
Knox Payments
Allow your customers to pay seamlessly with just their online banking credentials.
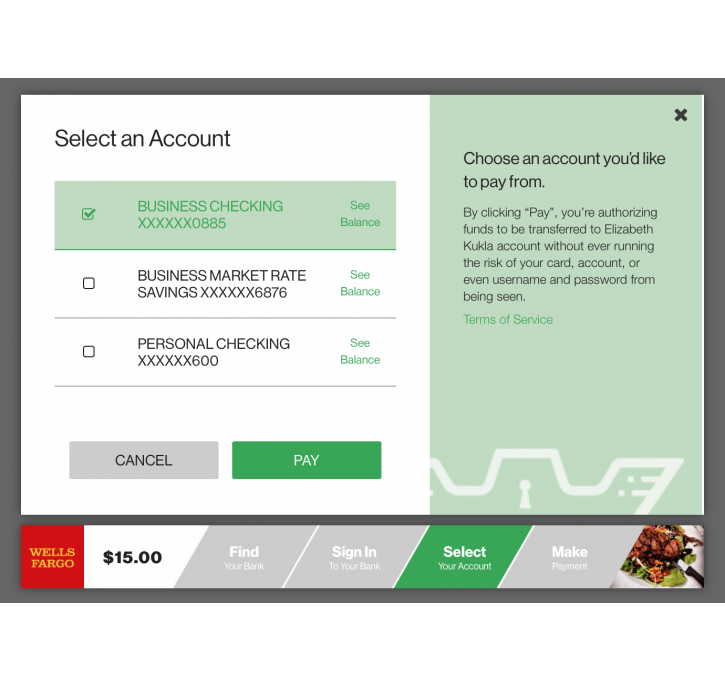
Knox enables the next generation of ACH payments, allowing users to make secure payments with just their online banking username and password, all while saving merchants from the burdens of incredibly high processing fees. Create a merchant account and start accepting payments in minutes: Signup Now
Magento 1.5 or later
Configuration
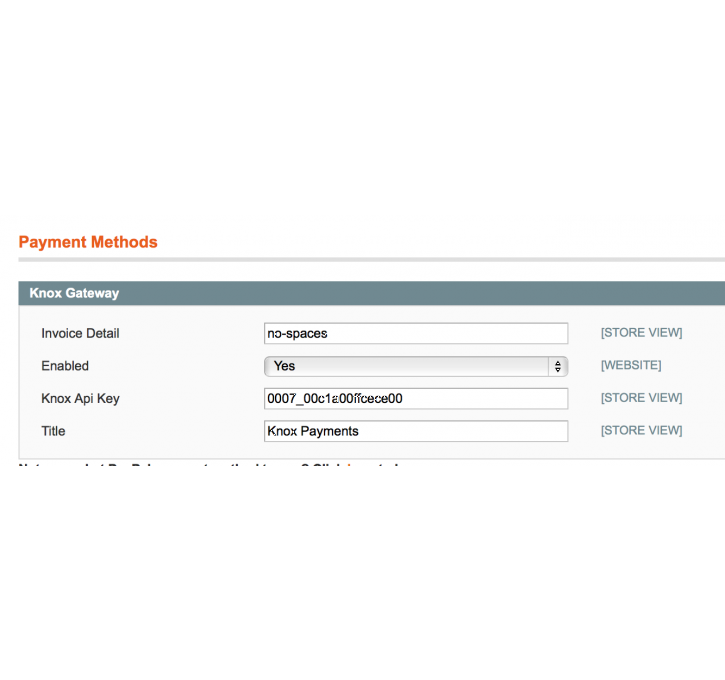
System->Configuration->Payment Methods
- 1) Enter your invoice detail (may not contain spaces)
- 2) Ensure "Enabled" is set to "yes"
- 3) Enter your Knox API key (found in your Knox merchant dashboard.)
- 4) Enter the text you would like to display in the checkout process to identify this payment option.
System->Configuration->Advanced
- 1) Ensure Knox_Gateway is set to "Enable"
Configure API Communication Permissions (Extremely Important)
For Knox to work, the merchant must create a SOAP api user and role in their admin panel so Knox can update order status and send confirmation to customer when payment is complete. Without this the gateway will not function and orders will not be updated appropriately.
Add a role for Knox:
- System=> Web Services => SOAP- Roles
- click "Add New Role"
- Role Name: Knox (case sensitive)
- Resource Access: "All" (defaults to “custom” so this must be updated under role=>resources)
- Save the role
Add a user for Knox
- System=> Web Services => SOAP- Users